mdadm is a tool that allows for creation and management of software RAID arrays on Linux. Creating an array is a rather straightforward process.
Install packages
The only package needed is mdadm itself
apt install mdadmPartition disks
We'll need to parition the disks to be used in the array before creating it. This isn't anything complicated, we will just be creating a single partition using all the space on each disk.
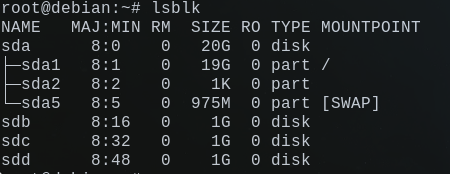
Use lsblk to get a list of disks attached to your system.

Then use fdisk to edit the partition table of the first disk. In my case this would be /dev/sdb. Be sure that you are selecting the correct disk as selecting the wrong one can result in data being lost.
fdisk /dev/sdbUse g to create a new GUID partition table. Use n to create a new partition, and then just press enter at all of the prompts to accept the defaults. Finally use w to write the changes. You can use lsblk again to verify the change and you should see that /dev/sdb now has a partition /dev/sdb1.

Repeat this process for your other disks before continuing.
Create the array
Creating the array is done with a single command, but takes just a bit of planning.
- Define an ID for the array, which is just a number identifier. I use 0 in the command.
- Determine the RAID level you want to use. I am going to use RAID5 in this example. The argument to --level is the number of the RAID level
- Determine the devices that will be used in the array. Somewhat contrary to the argument name, these devices will actually be the partitions of the disks and not the disks themselves. In the command, give the number of partitions (3) and then a space-separated list of the partitions that will be active in the array (/dev/sdb1 /dev/sdc1 /dev/sdd1).
- If you want to have any spare devices in the array you will define them with the --spare-devices argument. These are defined in the exact same way as the active RAID devices. In the example I use 1 spare /dev/sde1. Spare devices are hot-spares that will automatically be inserted into the array if one of the disks fails.
mdadm --create /dev/md0 --level=5 --raid-devices=3 /dev/sdb1 /dev/sdc1 /dev/sdd1 --spare-devices=1 /dev/sde1After creating the array run the following command to get details and the status of the array. It will take a bit to initialize the array, you will know this is done when the state is clean. You do not need to wait for the array to completely intialize to continue.
mdadm --detail /dev/md0Take note of the UUID and name values as we will need them in the next step.
Before moving on we need to make a filesystem on the array. I'm going to make a simple EXT4 filesystem here.
mkfs.ext4 /dev/md0Configuration Files
Open the mdadm configuration file at /etc/mdadm/mdadm.conf and append this line. Replace uuid and name with the values you got when running mdadm --detail, replace 0 whatever ID you chose.
ARRAY /dev/md0 metadata=1.2 UUID=uuid name=nameOptionally, create an /etc/fstab entry for automounting of the array. Replace /mnt/raid with the directory where you want to mount the array. If you made a filesystem other than ext4 make sure to change that value.
/dev/md0 /mnt/raid ext4 defaults 0 1
Consider donating if this article was useful. [BTC]